It allows you to specify the starting, ending, and POI height then generates a path and gimbal pitch angles based on those (and other) parameters making a perfect circle, spiral, or coil in a waypoint mission.
General workflow :
Use Google Earth Pro to define a perfectly circular path around the POI.
Export that path as a kml file.
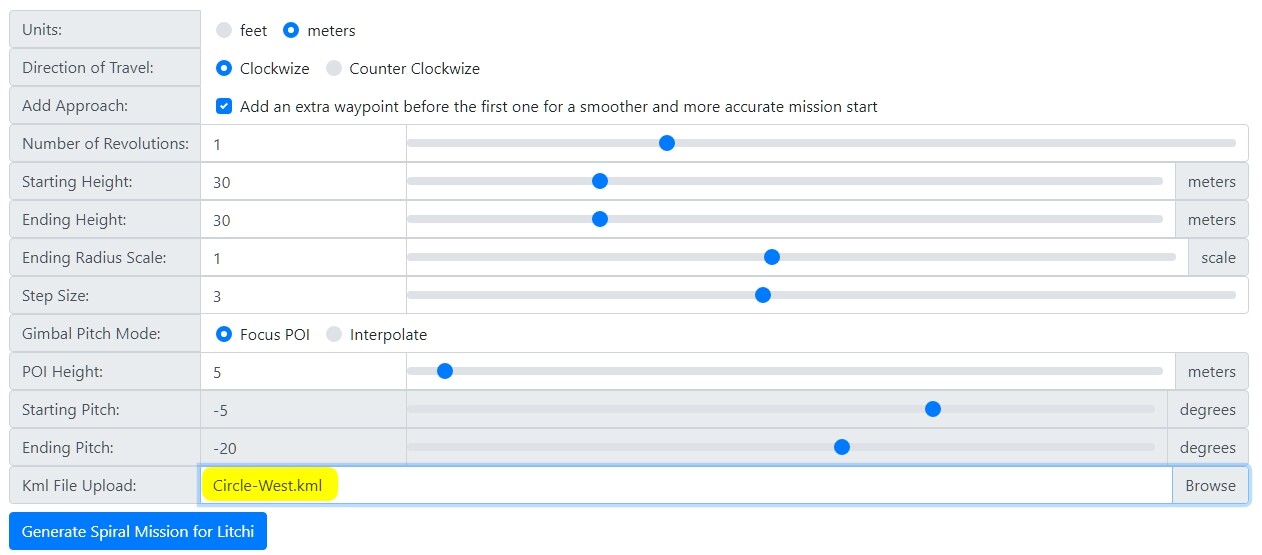
Import that circular path into my web application and specify heights and other parameters.
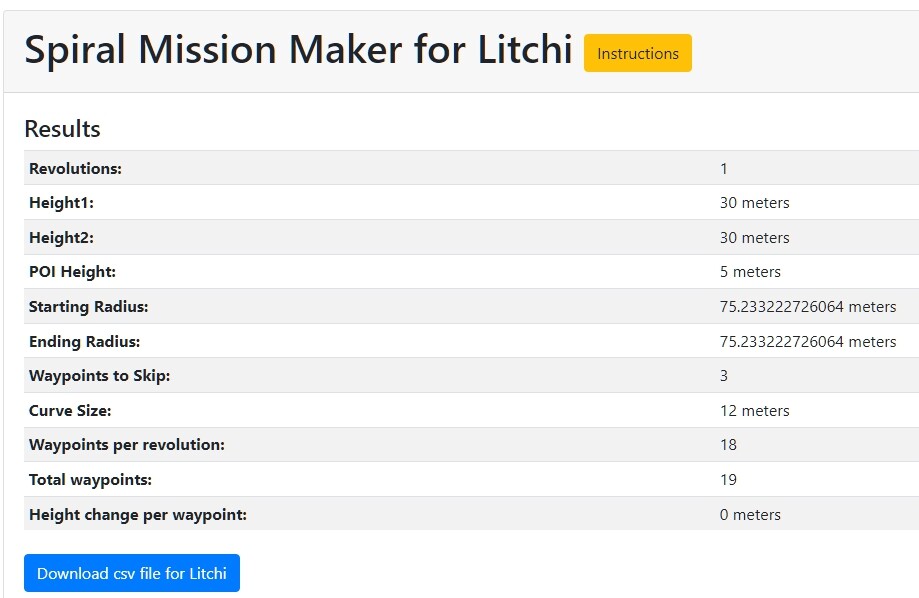
Export the path as a csv file.
Import that csv file into the Litchi Mission Hub (usually VLM).
Tweak as necessary.
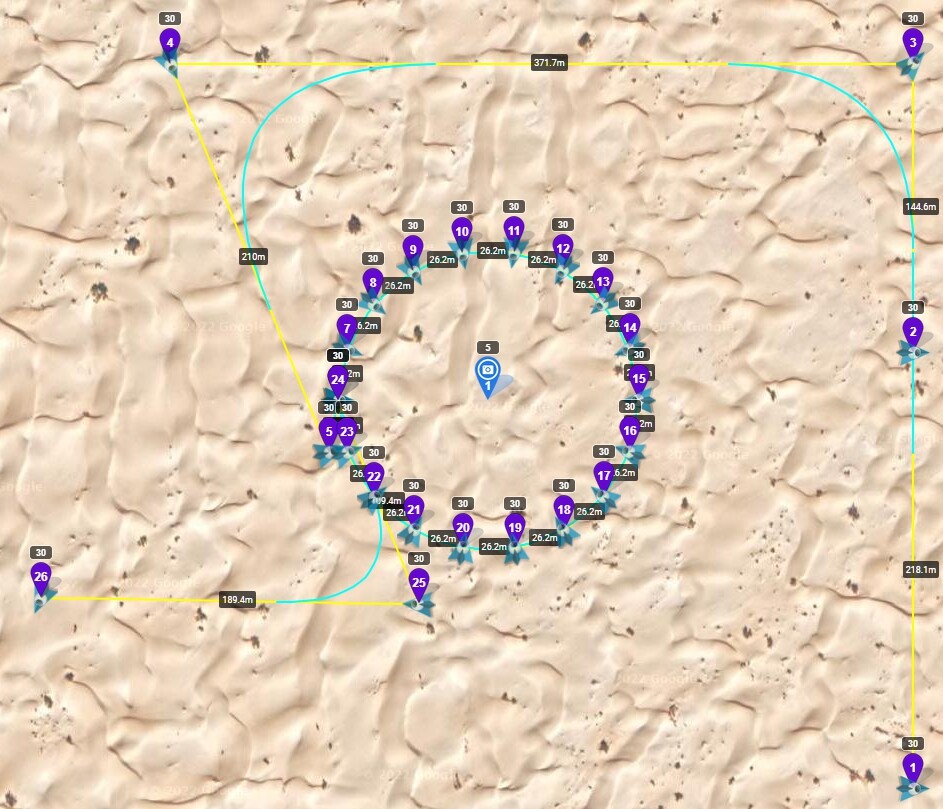
Export the mission as a csv file which opens back up in Google Earth Pro.
View and validate the virtual Litchi mission in Google Earth Pro.
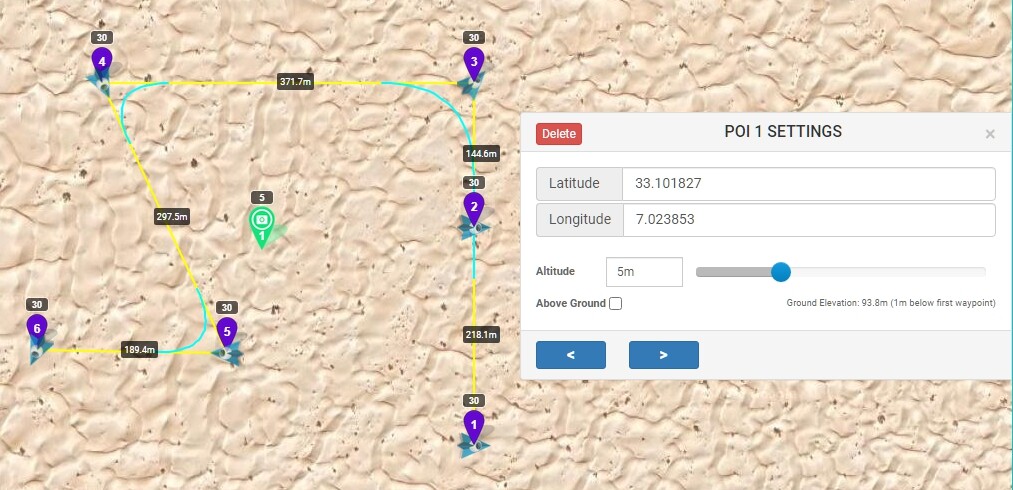
You want to fly a circle/spiral between WPa and WPb around a POIc.
Write down the coördinates of POIc and export this mission as a CSV-file.
Read the instruction for “Spiral Mission Maker for Litchi”:
(Link in Post#1)
Open Google Earth, place a pin with/at the coördinates of the POI, zoom in/out and draw a circle around it. The straight line defines the starting point of the circel.
Save as KML-file.
a CSV-file is a plain text-file.
The first line is the header, each other line represents 1 waypoint.
Open both CSV-files in Notepad, copy all waypoint lines from the spiral/circel file and paste them in between the 2 waypoints of the Mission Hub CSV-file.
Save this merged file (with a new name) and import it in the Mission Hub as a new Mission.
I want to make sure I understand what you are saying. Are you saying that when flying the waypoint mission using the Mavic 3 Classic, that the POI placed on that small tree is kept in the center of the frame as you wanted. However, when flying that same mission with the Mini 3 Pro, the POI and the small tree is always to the right of the center of the screen?
If that is what you are asking, my guess for the reason is that the Mini 3 Pro is using virtual sticks while the Mavic 3 Classic is using on-board waypoints. There may be a lag when using virtual sticks that causes the POI to always appear to the right of center. A way to confirm this would be to reverse that mission and fly in the opposite direction. If my assumption is correct, the POI will then always appear to the left of center.
No wes, what I wanted to say is that as they cut down the trees, the POI is in the center of the spiral (normal) but it was while flying that I saw that there was a small tree… so that others do not think that there is a shift and it does not properly follow the small tree…
I have created a perfect circle using google earth pro and saved the .KML file, however when i uploaded it to the spiral mission creator page, it does not generate a .CSV file for me after i selected the “generate” button, the page just turns blank (please see attached).
I am confused on how to use this tool. I am using a Mavic 4 pro. For example, I just want the spiral to go around a house. What do I need to do, in order to achieve this? Create a dummy waypoint mission on the rc2 pro and upload it here, to the web utility. What does that mission created on the RC2 pro have to look like? For example…do I need to put down a certain amount of waypoints or poi’s? This spiral web utility doesn’t create the shape of the spiral?
The dummy mission created on the RC2 is only a placeholder. It can be as simple as you can make it.
The Spiral Mission Creator requires that you upload a KML file from Google Earth Pro. The KML file is used to define the location and radius of the spiral. There are complete instructions in that web application.