Adittionally in Advanced Settings in the Survey tool (inside Mission Planner) you can select overlapping and sidelapping. It is not covered in the step-by-step tutorial on GitHub but I guess you can find that option pretty easily, there is also cross-grid which is pretty useful.
Yes i have selected desired overlap but i want to be sure the camera settings is correct so i get the correct GSD. Another question, do i have to set action in litchi to tilt the camera 90 degree?
I do not know the settings for the mini 2 as I don’t own one.
But I think they are the following:
4000 x 3000 image (in 4:3 mode, select before flight)
Sensor size: 6.17mm width by 4.55 mm height.
Focal length I don’t know, you need to measure. Take a photo with gimbal straight down from 50 meters height, then measure in google maps how many meters are seen in the photo horizontally. Then go to mission planner, set the survey height to 50 meters and then adjust the focal length until the number in the Field of View Horizontal (m) matches with the one measured.
About the gimbal: You don’t need to set any action in Litchi, in mission settings in litchi, before importing the mission, set the gimbal mode to disabled, as seen in step 14 in my github tutorial, then before starting the mission on your drone, just set the gimbal tilt manually to 90 degrees, using the gimbal wheel on the controller, then during the whole mission the gimbal position should stay as it was set before the misison.
Yaroslav,
I wanted to thank you personally.
your tutorial, time, and python are awesome.
I am working with your data now. I too am currently using a Mini 2.
Thanks again.
The tutorial was very easy to follow even for this old guy. Now where can I find my camera specs for the Air 2S? Or does someone already have them that could post them here.
It would be nice to have a sticky with all the different camera specs for us to reference.
Thanks for the great work.
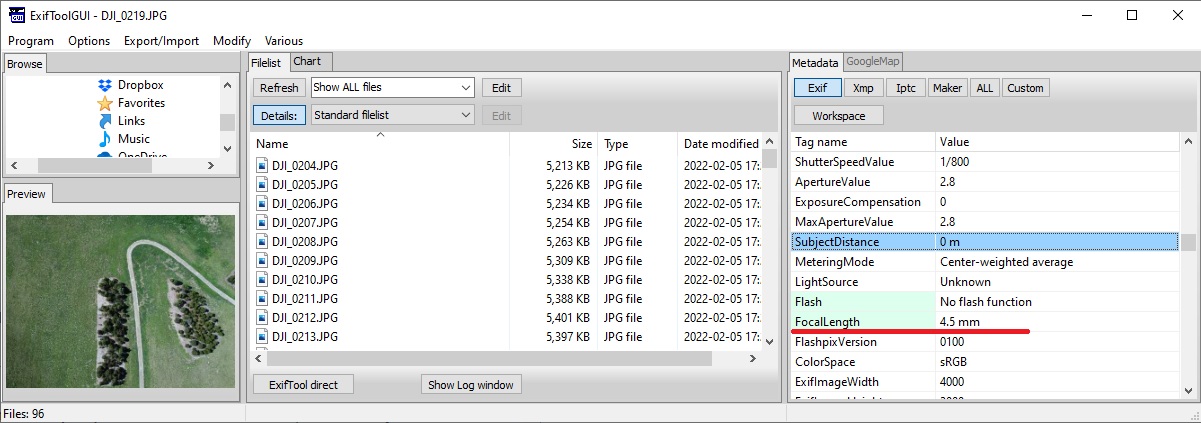
the big thing to remember is that the focal length isn’t the “35mm equivalent”. When in doubt, take a photo with your drone and examine the EXIF data with a proper EXIF viewer. Focal length (and dozens of other pieces of data) is stored within the photos taken so you can obtain objective (well, DJI is notorious for having inaccurate info in EXIF) information about your drone there.
OK thank you very much for this. I am still a little lost on how the camera starts to take photos. Do we have to manually do it or will it start taking photos automatically in the mission?
You set the camera mode to 3:4 Single Photo.
Mission Planner automatically calculates where it needs to take photos and it will automatically take photos, but you need to be in photo mode before you start the mission.
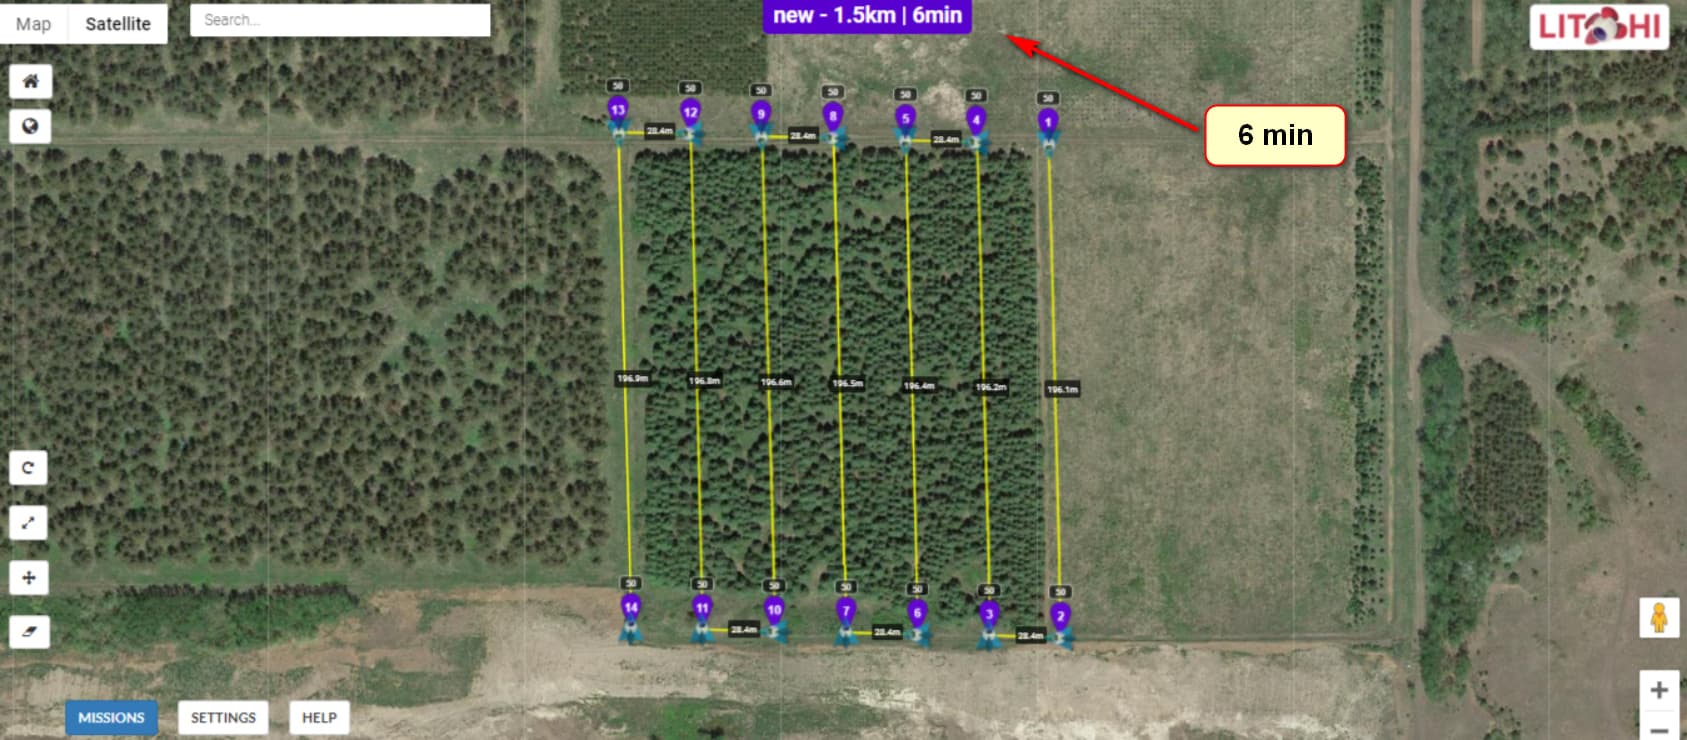
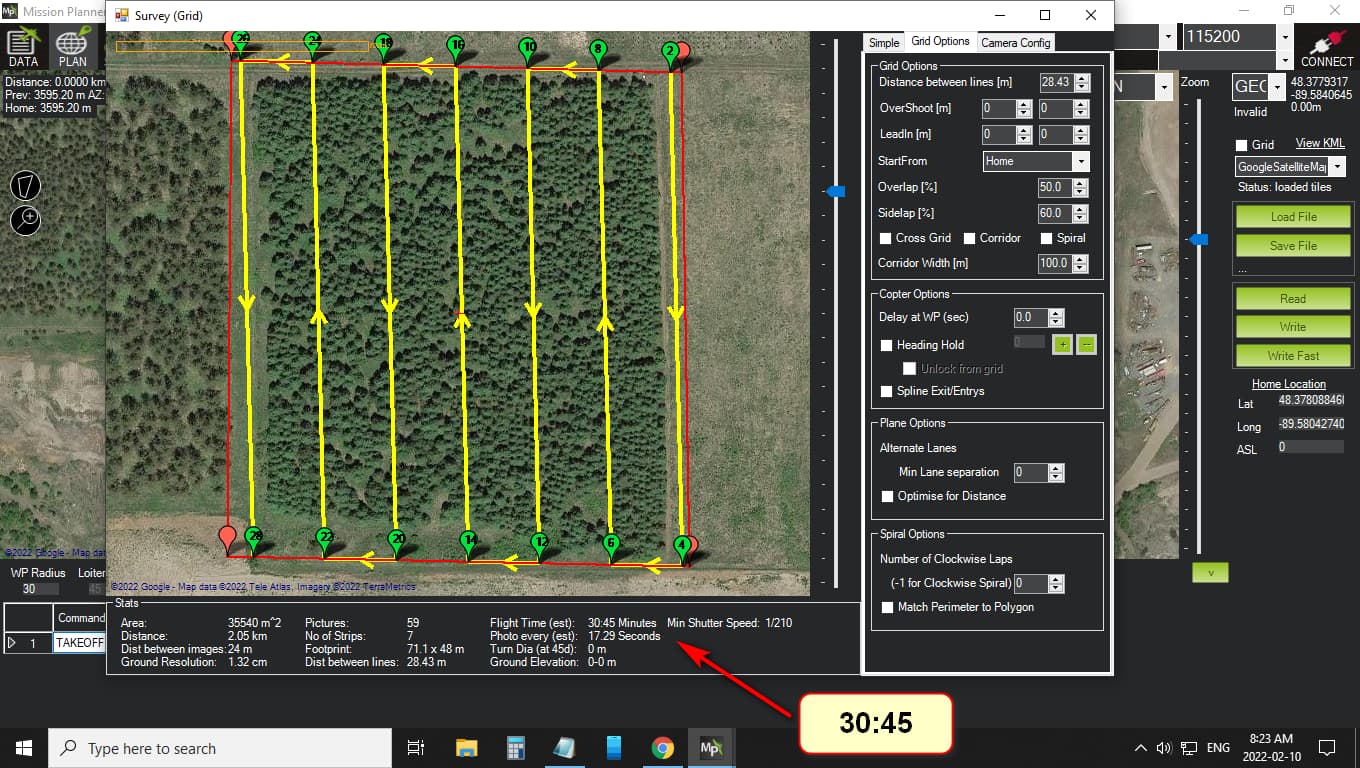
OK playing around with it this morning having my coffee. I made a simple mission on a tree farm near me. In mission planner it gives a time of about 30:45 and when I load it in Litchi Hub it shows 6 minutes. So which one is correct or what have I possible done wrong?
This might be of some value to some people. It will Calculate the Ground Sampling Distance (GSD) and the image footprint on the ground by inputting values for the:
Make sure that the value in Mission Planner Survey Tool (Simple Tab) speed matches with the speed set in Litchi Settings (Mission Settings). If you want mission planner to use km/h or mp/h you can change that in mission planner settings tab.
Flew my first mission today. Uploading to Maps Made Easy to a free account. Will update this post when it is ready.
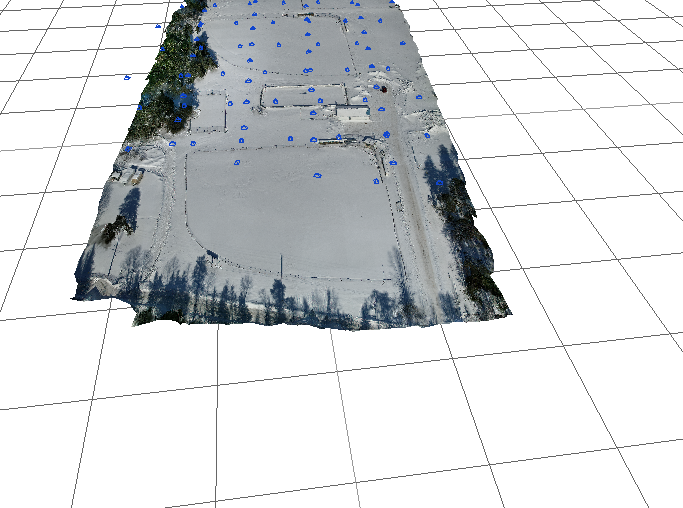
Here is a screen shot from running the photos through 3DF Zephyr.
Thanks for a great tool that Litchi is missing!
Maybe this can also be used for 3D modelling?
My 2 cents are to use gimbal at -45 and use cross grid for a starter.
Do you have an idea how to do this in a useful way?
There are many tools to create a 3D model from a group of photos.