I have created another Litchi mission utility. This utility is used to create partial panorama missions. Google Earth Pro is used to define the focal point of the panorama. Controls are used to define the width and height of the partial panorama.
I know that many of you capture partial panorama photos manually by visually overlapping a series of photos. That may be the preferred method for some. For those of you who would like to pre-plan a mission to capture one or more sets of partial panorama photos, this utility will make that process possible.
Some of you fly drones that are only supported with DJI Fly waypoints. I also have a converter that can convert these Litchi missions into DJI Fly waypoint missions.
All of these mission utilities are available here:
Thank you very much for your whole work, very useful.
I tried this one for a simple mission. The result is four photos at waypoint 2 with a gimbal pitch of -9° and four photos at waypoint 4 with a gimbal pitch of -9°. What are the 4 other waypoints doing ? I suppose that waypoints 1 and 6 can be moved in order to provide a starting and a finishing point close to the operator but waypoint 3 and 5 ? Maybe I missed something in setting the utility…
The mission here :
Also, a “stay for” of 1 or 2s before and after each photo could be useful.
Merry X-Mas !
WP1 tilts the camera to +11 degrees.
WP2 take 4 photos (169°, 208°, 245° & 283°) at that gimbal angle (+11)
WP3 tilts the camera to -9 degrees.
WP4 take 4 photos (169°, 208°, 245° & 283°) at that gimbal angle (-9)
WP5 tilts the camera to -30 degrees.
WP6 take 4 photos (169°, 208°, 245° & 283°) at that gimbal angle (-30)
This would result in 16 actions at each waypoint.
The maximum number of actions at one waypoint is 15.
Litchi limits us to 15 actions per waypoint. Therefore, if more actions are needed, they need to be spread across several waypoints. Also, since adjacent waypoints cannot share the same coordinates, a “dummy” waypoint must be placed between the waypoints where photos are taken. This software takes care of all of this for you so that you don’t have to think about it and configure every waypoint manually.
In all of my testing with several different drones, I have found that “wait for” actions were not needed. If you find an example where “wait for” actions are necessary, I can add them. Of course, doing so would also increase the number of “dummy” waypoints required.
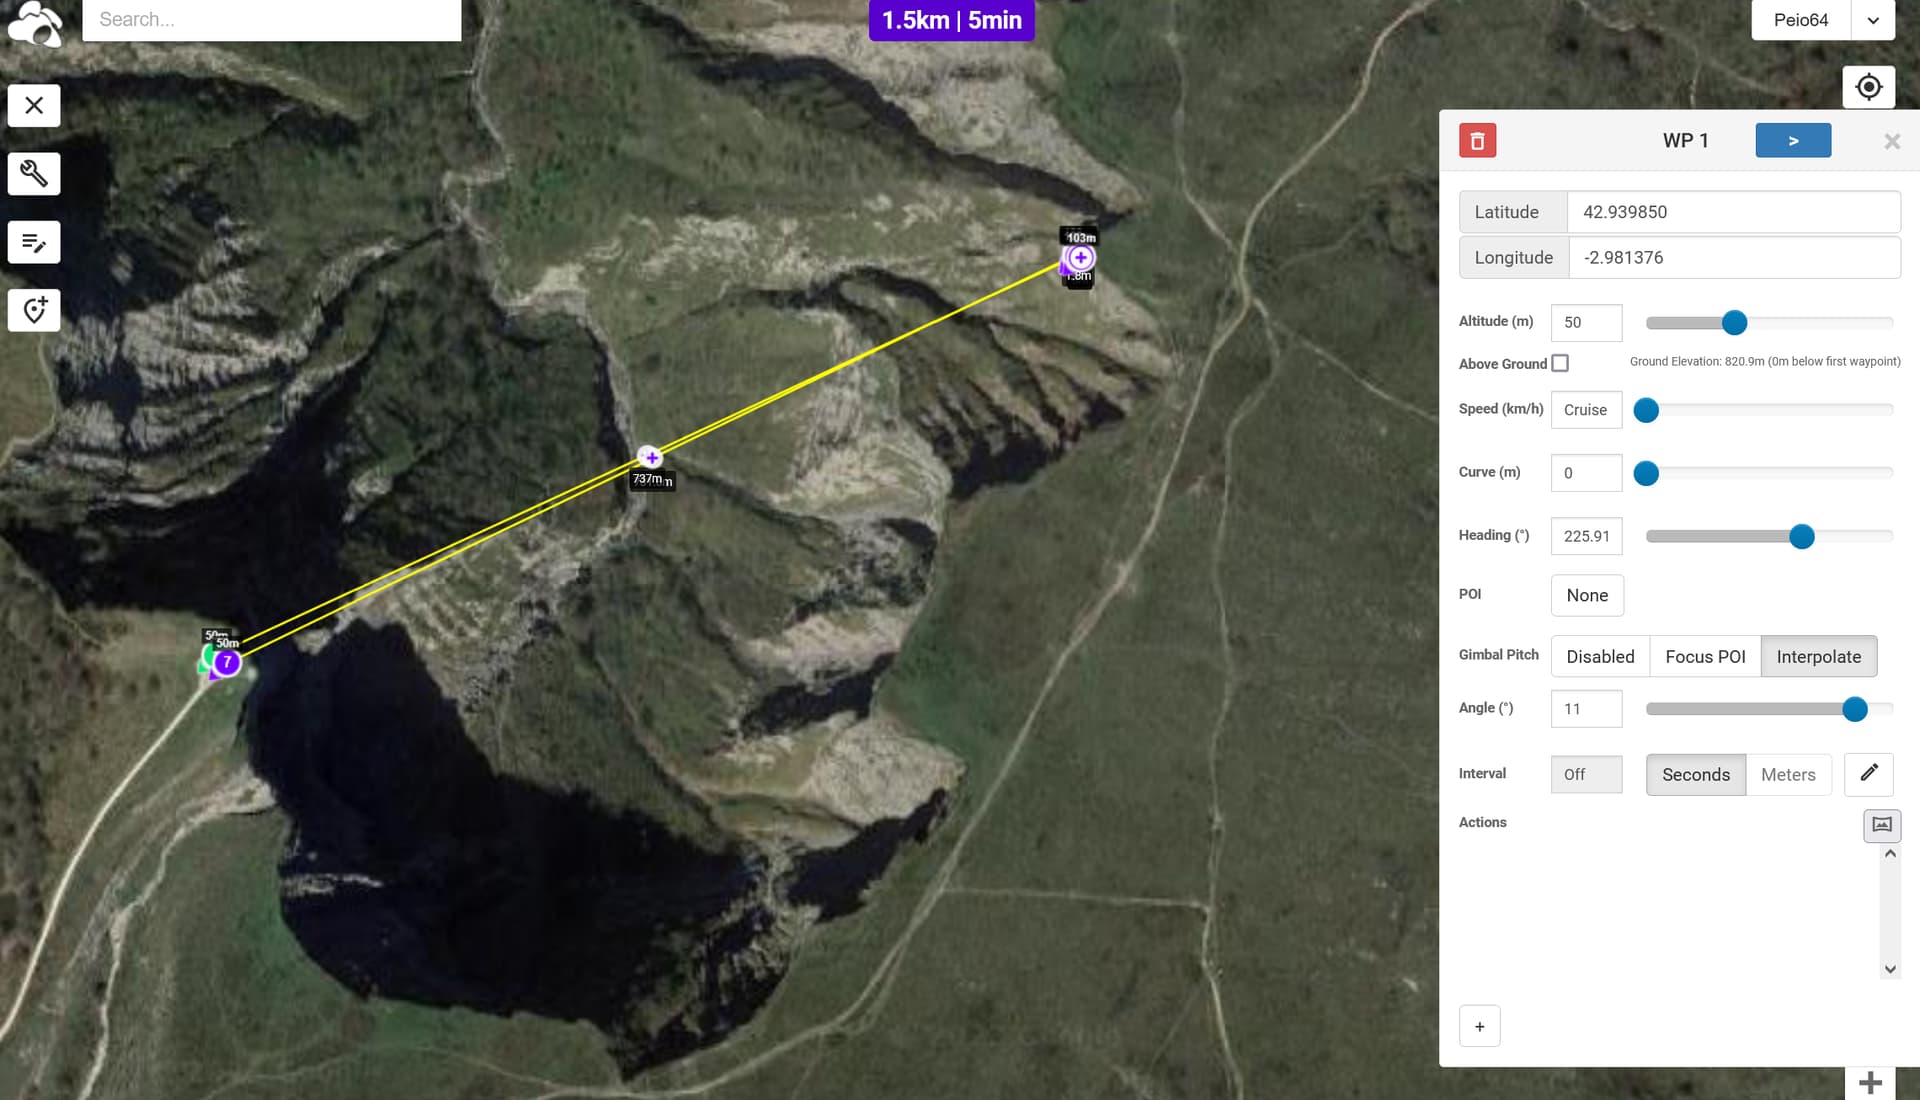
Yes, I agree. So, how is determined the 103m altitude in my mission since the take off point is not specified originally ? Is it 103m above terrain elevation where the pano is shot ? It can work if “above ground” is checked. but with a great margin of error if photos are shot above a very steep slope as in my example. Don’t you think that the take off point should be determined first and altitude at which the pano is shot calculated with this elevation as reference ?
The actual above sea level altitude of your take off point is irrelevant, unless you have ‘Above Ground’ checked for each waypoint.
If you are flying near steep slopes, its always better to err on the side of caution.
To be certain of the safe altitude at your desired pano position, I would suggest manually flying to the desired point and noting the indicated altitude (which will be above your take-off point. Then adjust your waypoint altitude accordingly.
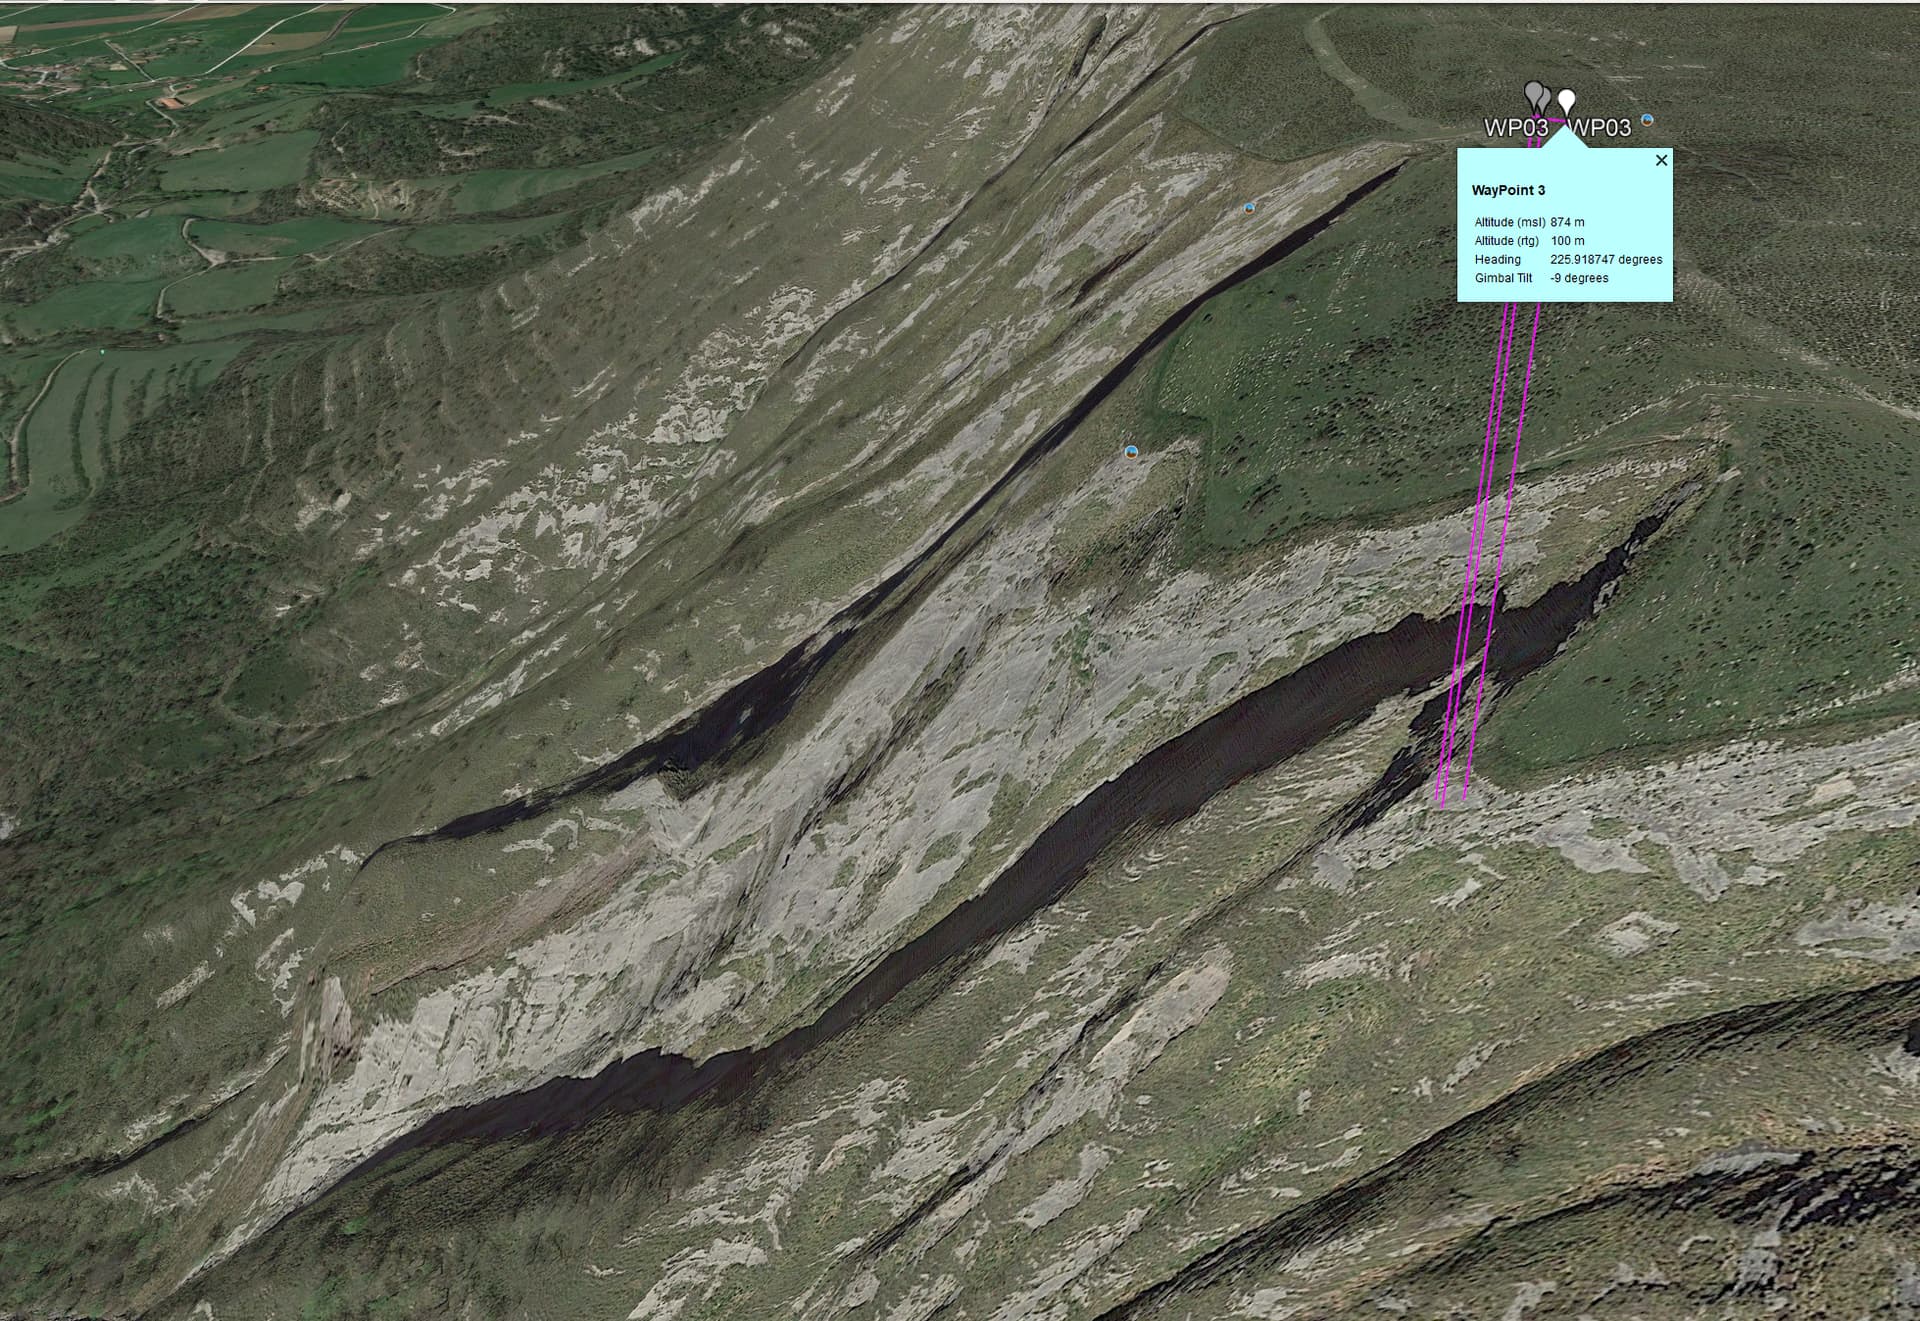
Thank you. So, if I understand well, altitude at pano waypoints is calculated with respect to the terrain elevation under these waypoints. Is this right ? Hereunder is a complete 3D view of the mission project as rendered by VLM and G-E. Circled in yellow is the only place I can take off during winter. It is pretty far (about 800m) from the place I have to fly (circled in black) to get a nice pano of the entire circus with the waterfalls (red dotted line) in good position.
I wrote manually a simplified mission with only two waypoints, the first one being placed above my take off point, the second in the place calculated by your utility for shooting the partial pano. If i set at WP 2 the altitude of 100m as calculated for all waypoints of the partial pano, this appears to be about 40m too high taking into account the local terrain elevation :
I recognized that my case is pretty special but for guys like me who use to fly over uneven terrains, I think that it would be easier and more accurate if you could add to your utility a first “take off” waypoint serving as reference altitude/elevation and systematically setting the altitude of the pano waypoints as “above ground” altitudes with respect to this initial waypoint. If possible, indeed.
This would allow only minor corrections once in the field. I hope I am clear enough, English is not my first lenguage.
And again thank you for your very useful work (I already used with success your 360 pano mission) and merry X-mas.
The altitude is/was determined from the placemark view you chose in Google Earth Pro. If your takeoff location is not at the same height as the ground under the pano waypoints, you will need to use the Above Ground option and adjust the waypoint heights accordingly.