After experimenting a bit, here’s a quick guide to
- Panoramas in general
- World Sphere / Tiny World
- Uploading to Google Photos to be used in 3D/VR mode
Notes:
- Need Adobe Lightroom, or potentially, ptGui can do similar things
- Need Photoshop, I suspect Gimp will work as well.
- Need jExifToolGUI (and exiftool itself)
- Drone set to RAW (DNG) mode. Better until you have to go to jpg (for google photos)
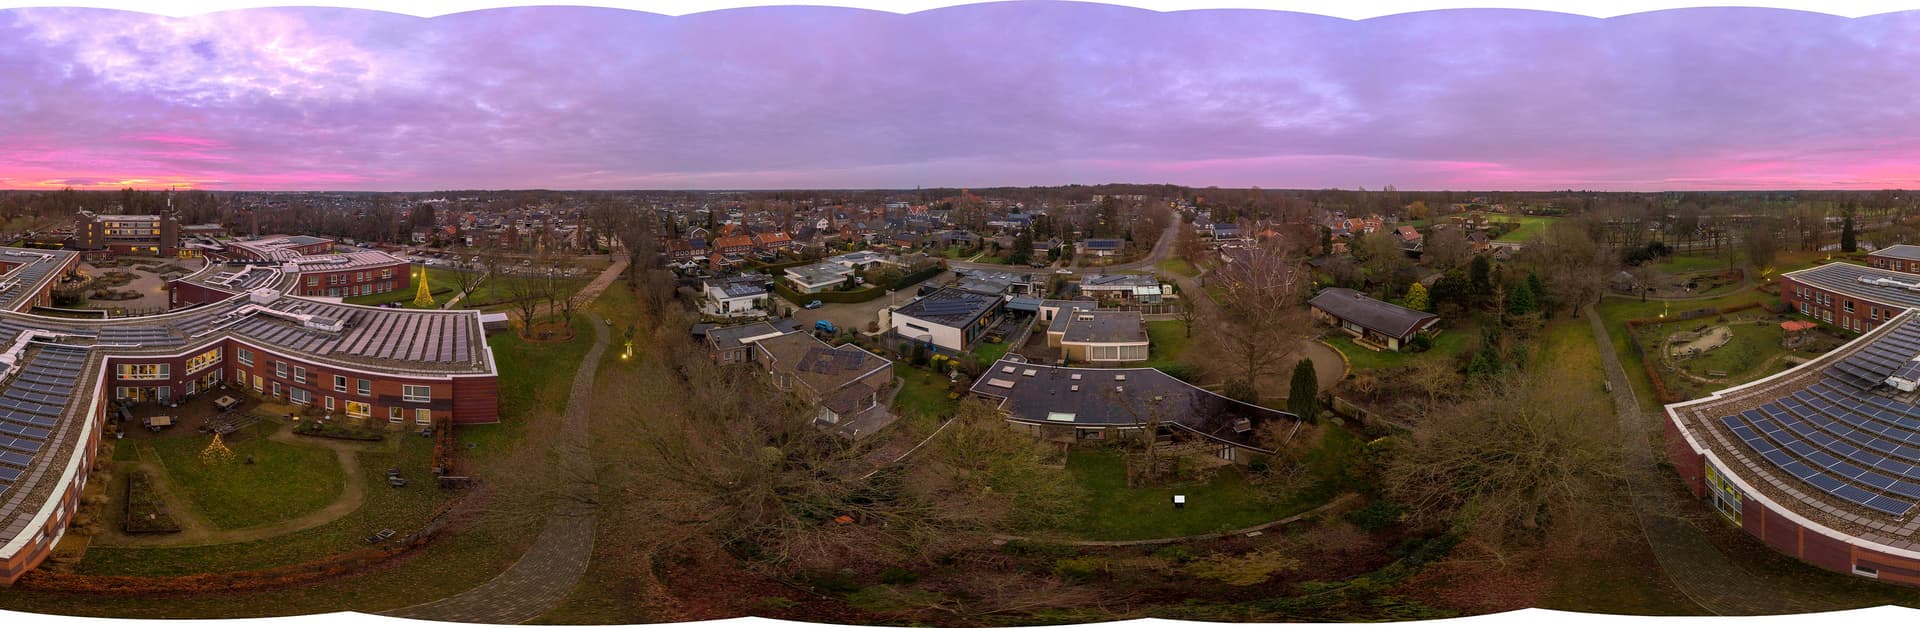
- If you want to make a world sphere, you need continuous sky at the top of the picture. This typically means you have to fly above all trees, and ideally above everything even in the far distance.
Main Panorama Taking/Stitching
0/ (optHDR) select AEB mode if you want to do HDR. I recommend this.
1/ Get your drone to a good spot, just use the ‘auto panorama’ button.
- I haven’t quite figured out how to aim the drone’s start point to have a panorama file where the main subject actually is the center. I would say you probably have to aim 30deg to the left of your main target for some reason.
2/ Import everything into lightroom
3a(optHDR)/ Make stacks - right click and select stacks->auto-stack by capture time, use 1s or maybe 2s, so the 3 HDR photos are stacked together.
- Lightroom HDR Pano often doesn’t work. Stacking helps.
3b(optHDR)/ Merge → HDR
4/ Select all pictures, Merge → Panorama (spherical)
5/ Export to DNG
6/(Opt) your export probably has a few fringes of ‘white’ which are probably best to cut off in photo editing
→ then you have your panorama. Not rocket science yet.
Exporting to Google Photos 360 viewer
7/ For Google Photos to recognise the file as a 360 photo, export to JPG, then use a XMP/EXIF editor. In jExifToolGUI, you:
- Load the file
- Edit Data
- GPano tab
- Set:
Cropped Area image height pixels: 1080
Cropped Area image height width: 1920
Full Pano height: 1080
Full Pano width: 1920
Cropped Area left pixels: 0
Cropped Area top pixels: 0
- Save
8/ Upload to google photos, it should be recognised as a 360 pic.
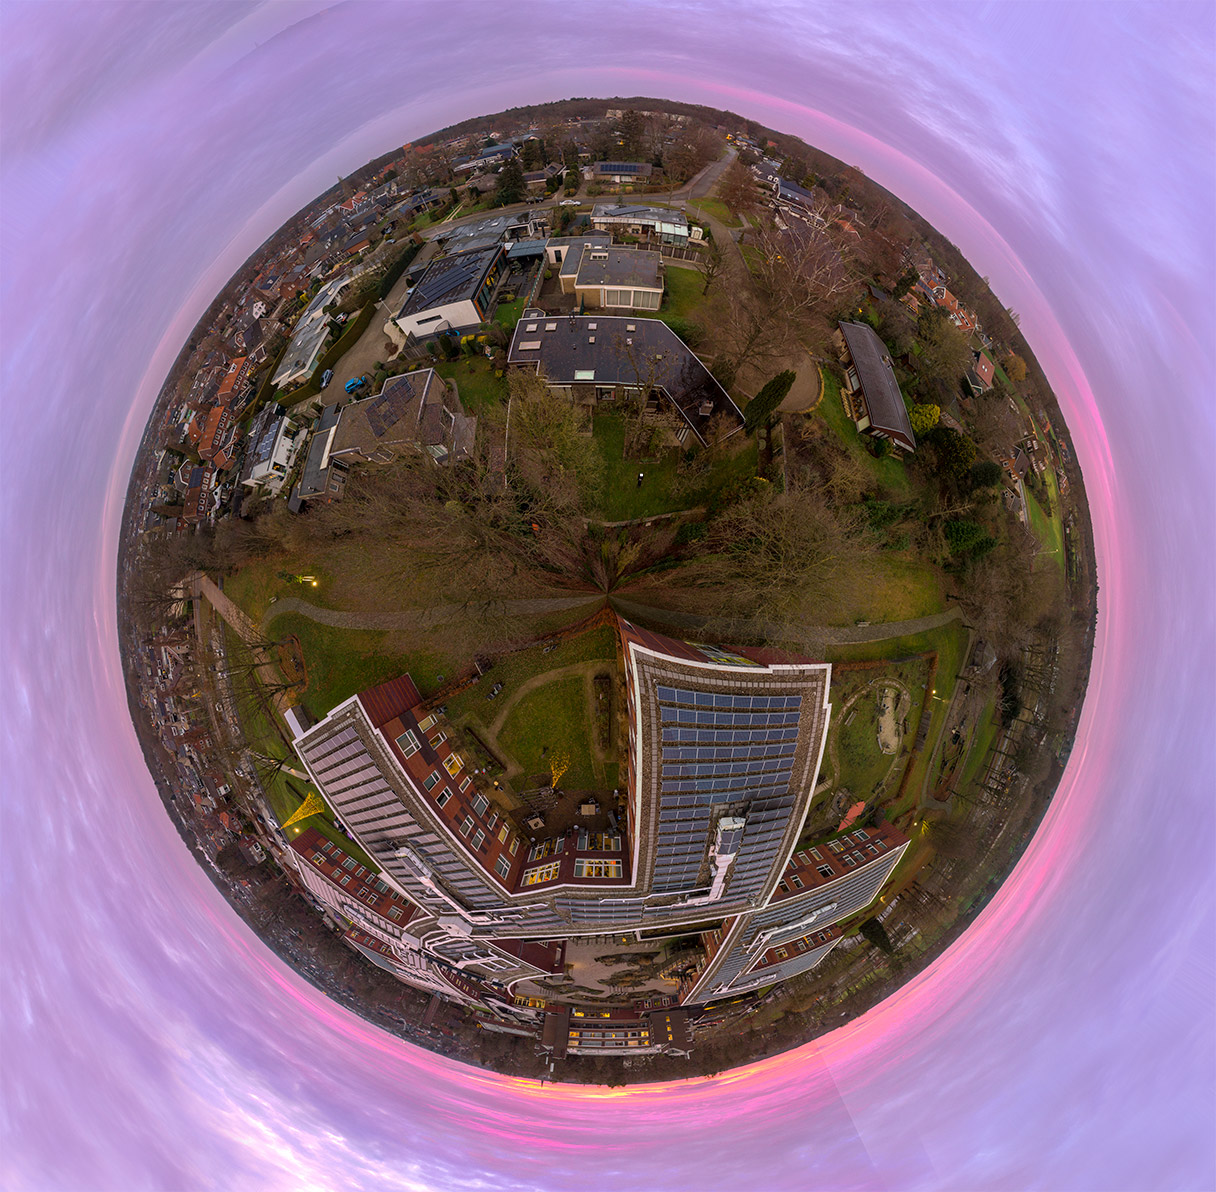
To create a little world sphere
9/ Open Pano DNG in photoshop
10/ Change canvas size, make the image square. (use the height for the width number)
11/ Use Free Transform to squeeze the wide image into the square
12/ Filter → Distort → Polar (rectangular to polar)
13/ Rotate the picture upward if you wish, usually nicest. If you do though, you will need to use your photoshop skills to extend the borders outward.